Main Floor Renovation in Dunwoody Club Forest

Main Floor Renovation in Dunwoody Club Forest

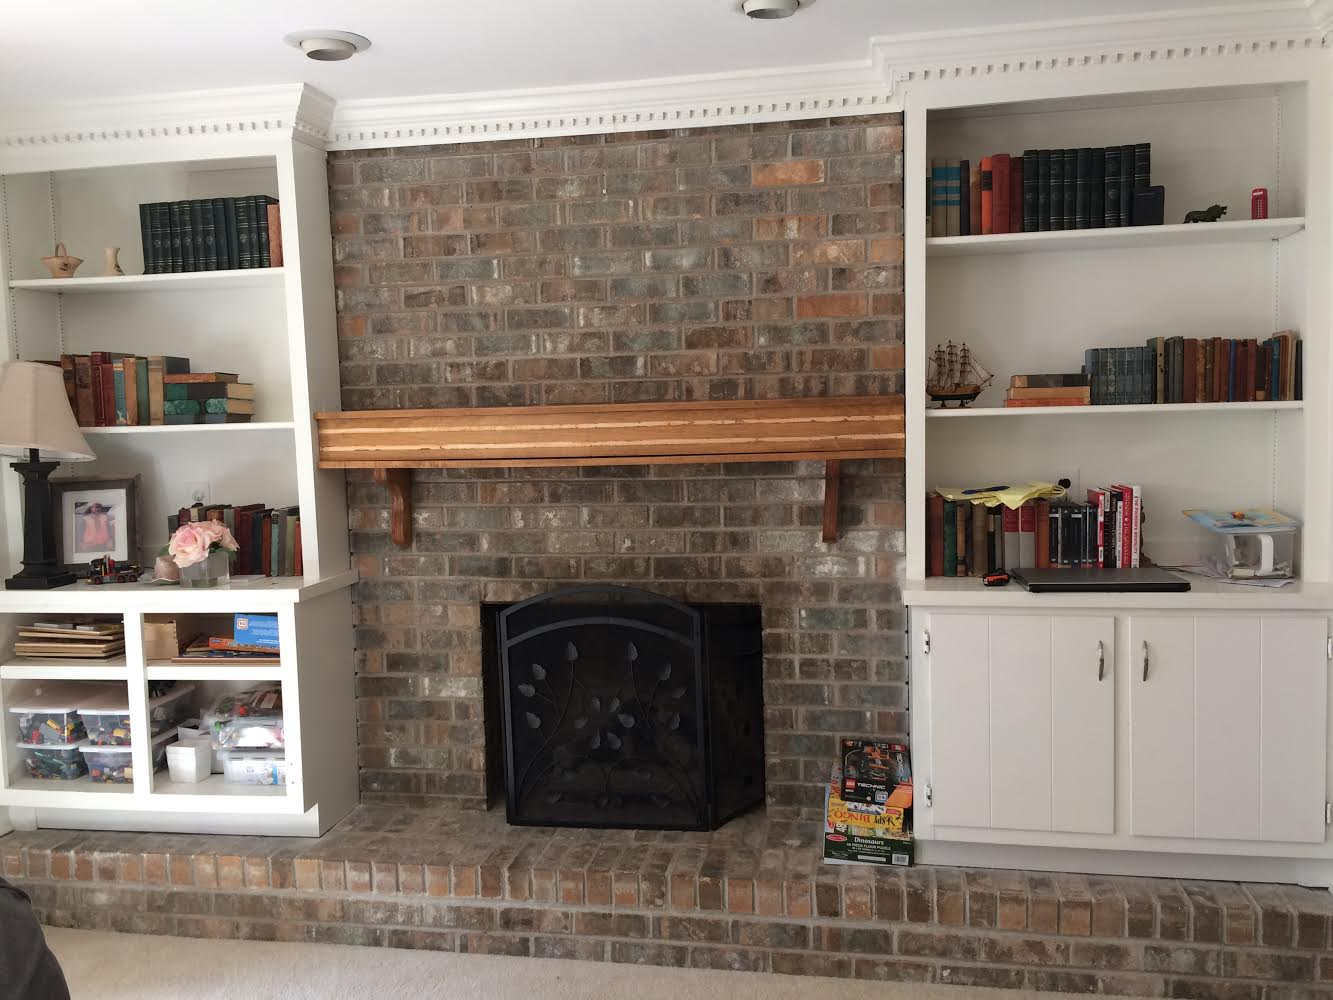
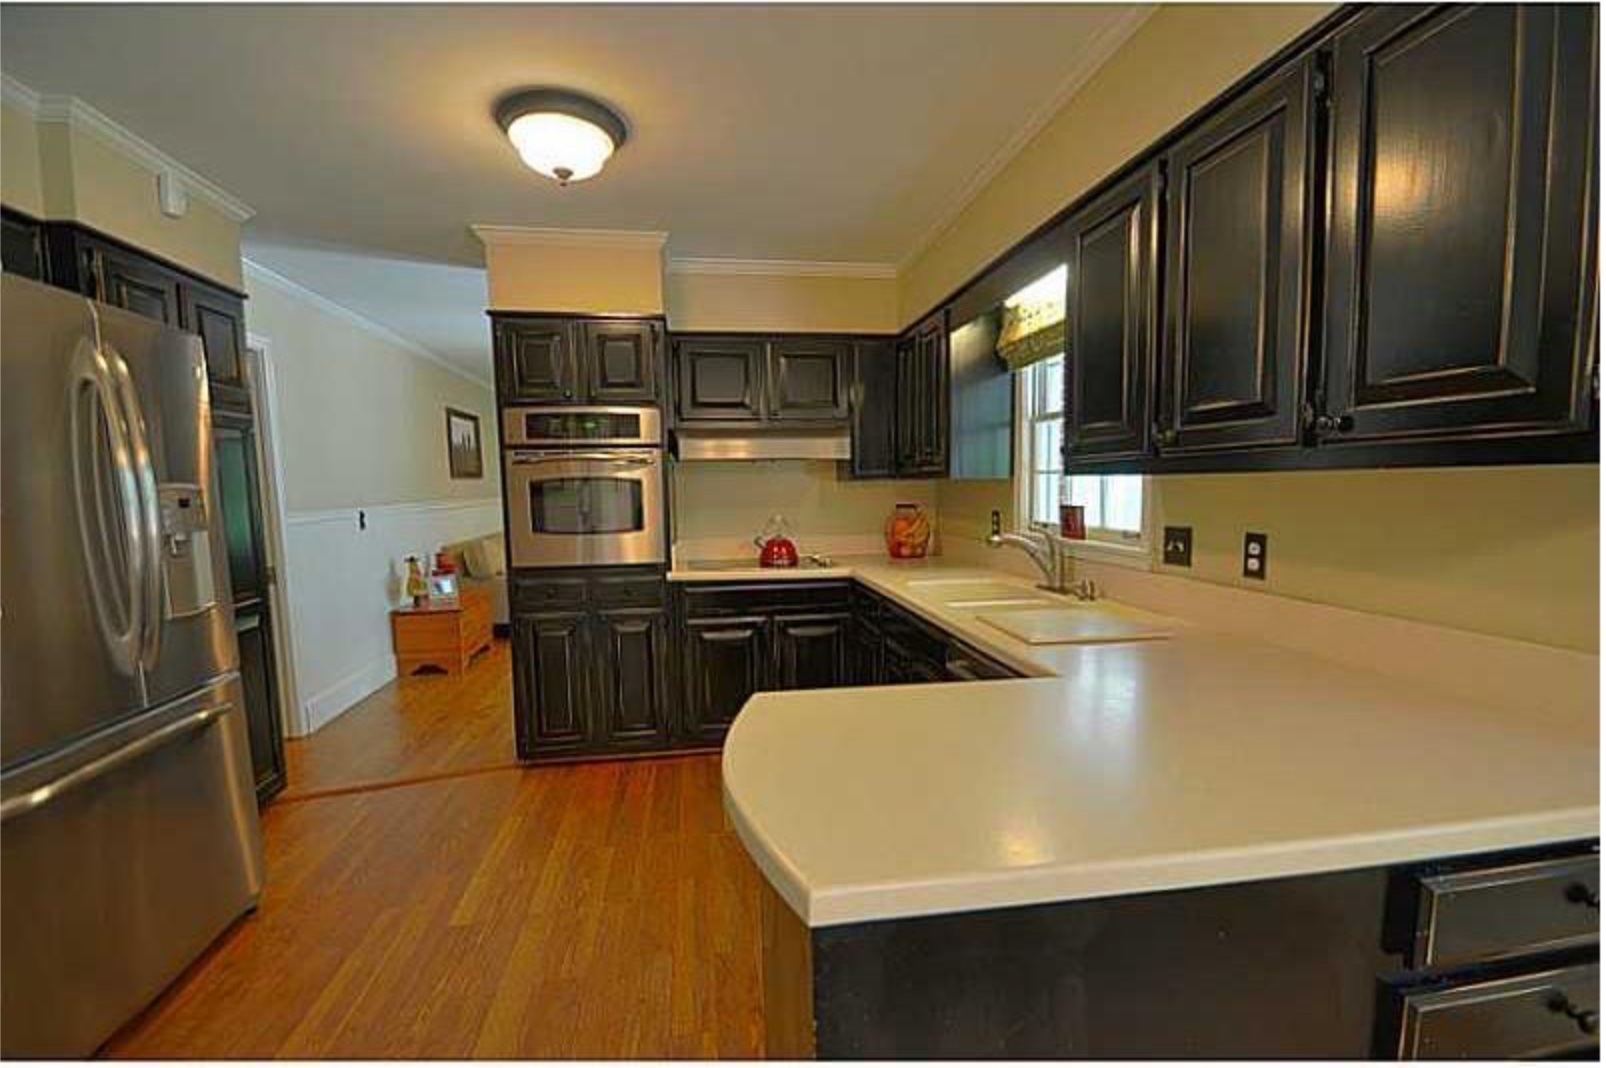
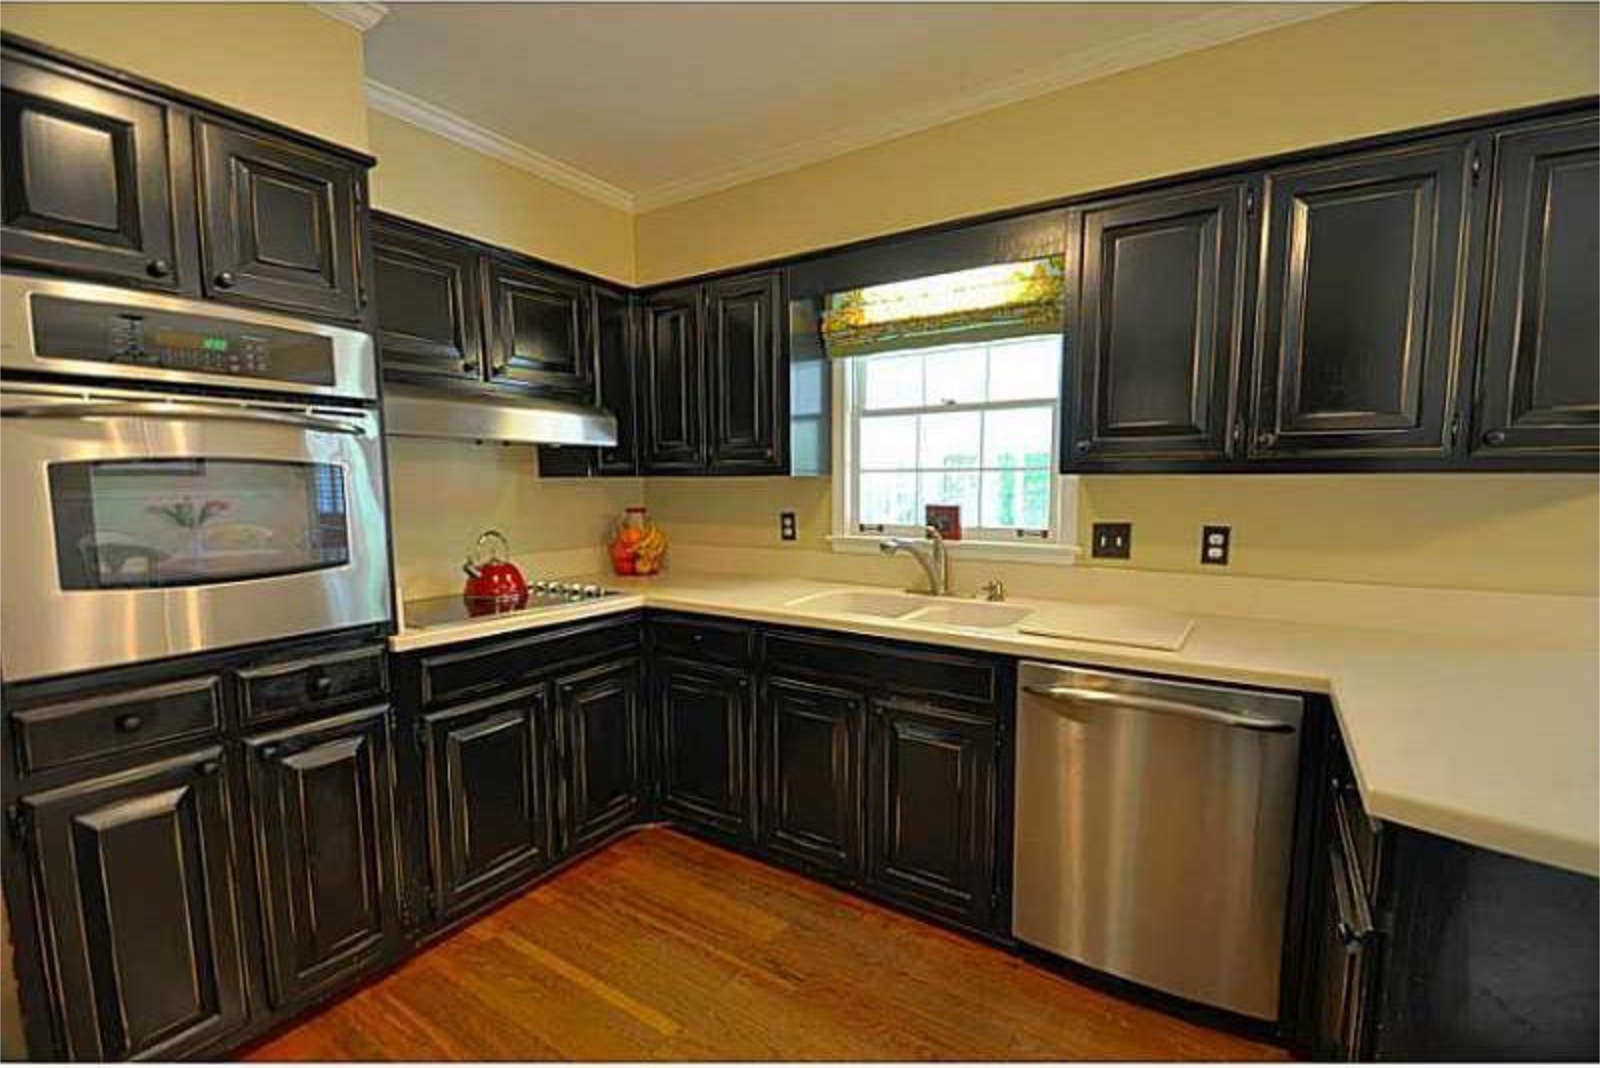
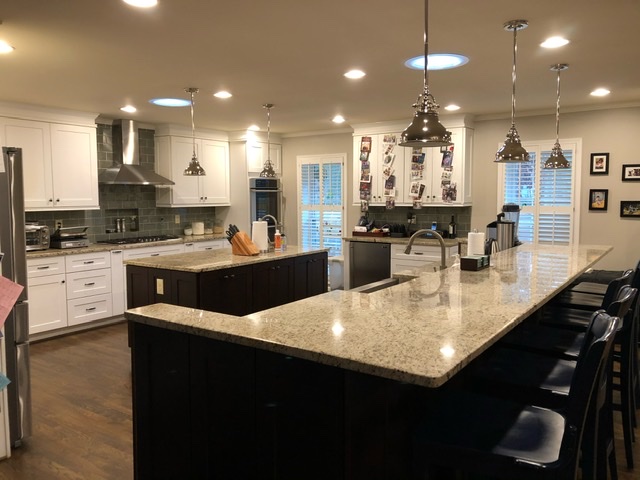
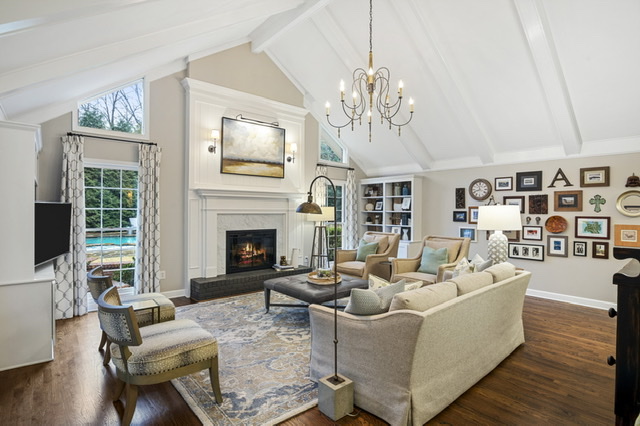
We are back on course with lovely home renovations for you to enjoy.  Personally I adore the house we are featuring today!  The Adkins family are some of our dear friends and I have loved getting to live vicariously through them and enjoy not only their beautiful house, but also their lovely pool and yard.  To be honest there really isn’t much to say about this house as the pictures speak for themselves.  Brandon and Kelly waited for the perfect house to come on the market for 5 years before purchasing this one.  They specifically wanted a walk-out back yard, a guest bedroom on the main floor, and a bonus room that could be turned into a craft room.  This house met all those needs!  Kelly and Brandon worked with a team of people to make this house as gorgeous as it is.  The three main rooms we thought we would show today are the family room, the mud room, and Kelly’s craft room.  So, without further ado check out the before pictures of their family room and sweet baby who also made the cut!

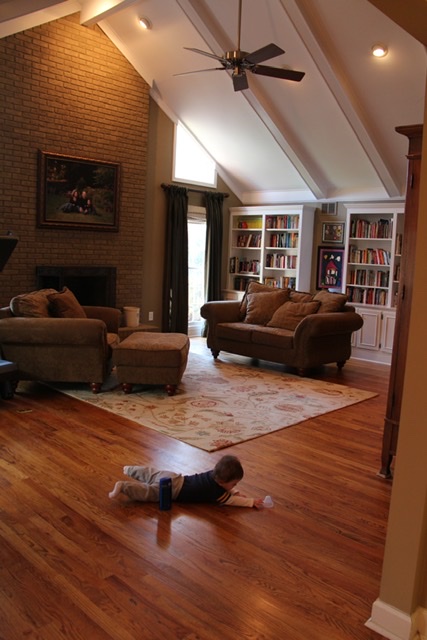
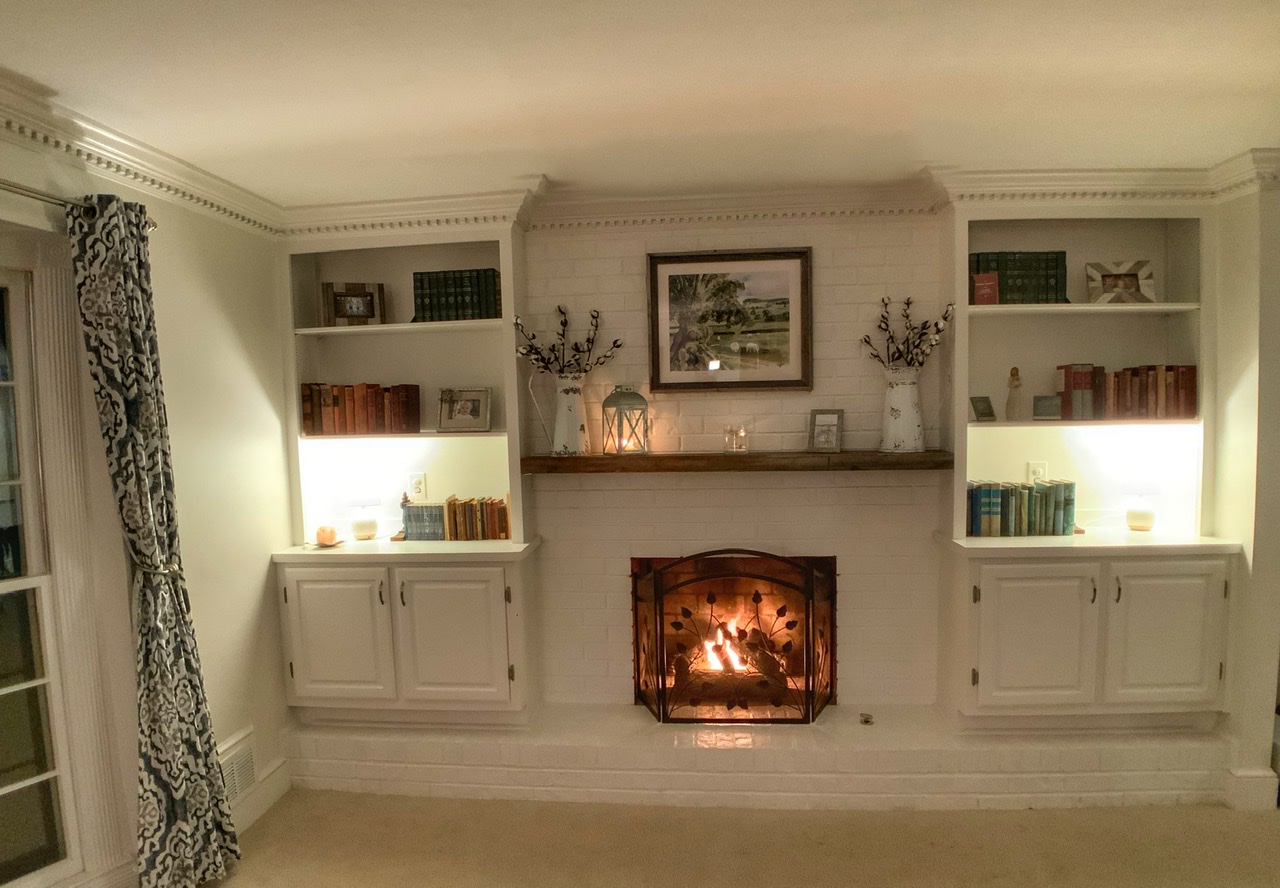
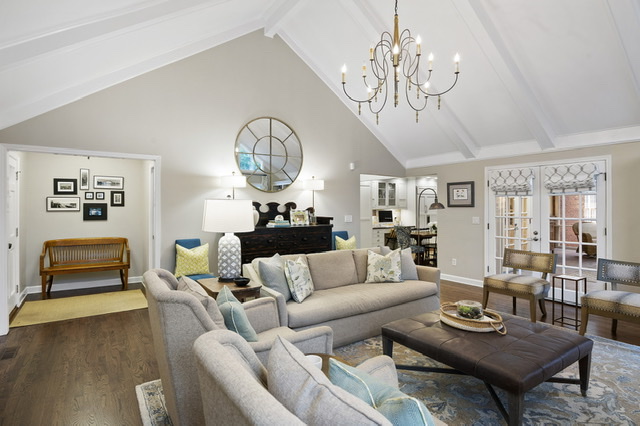
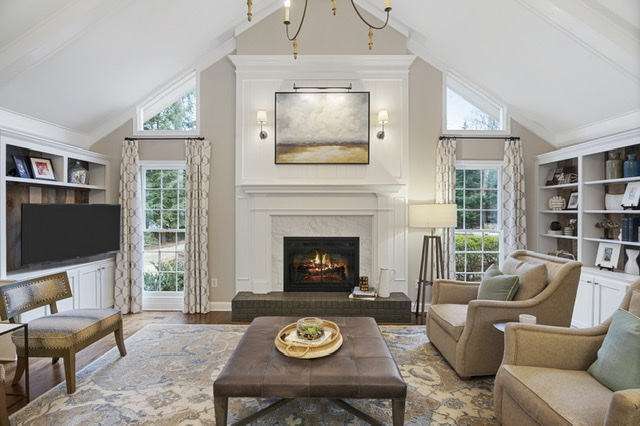
They worked with a designer to choose the colors and decor for this room.  I think one of the most unique features of this room to me is the wood that they put in the back of the built-in book cases.  Brandon went to a Otto North Carolina to find the wood for this project, and the effort certainly paid off.  The majority of the wall decor came from their travels around the world making it all the more meaningful for them as a family.  Kelly pointed out that many of their framed smaller pieces are actually nice postcards that they found along the way.  What a great idea!

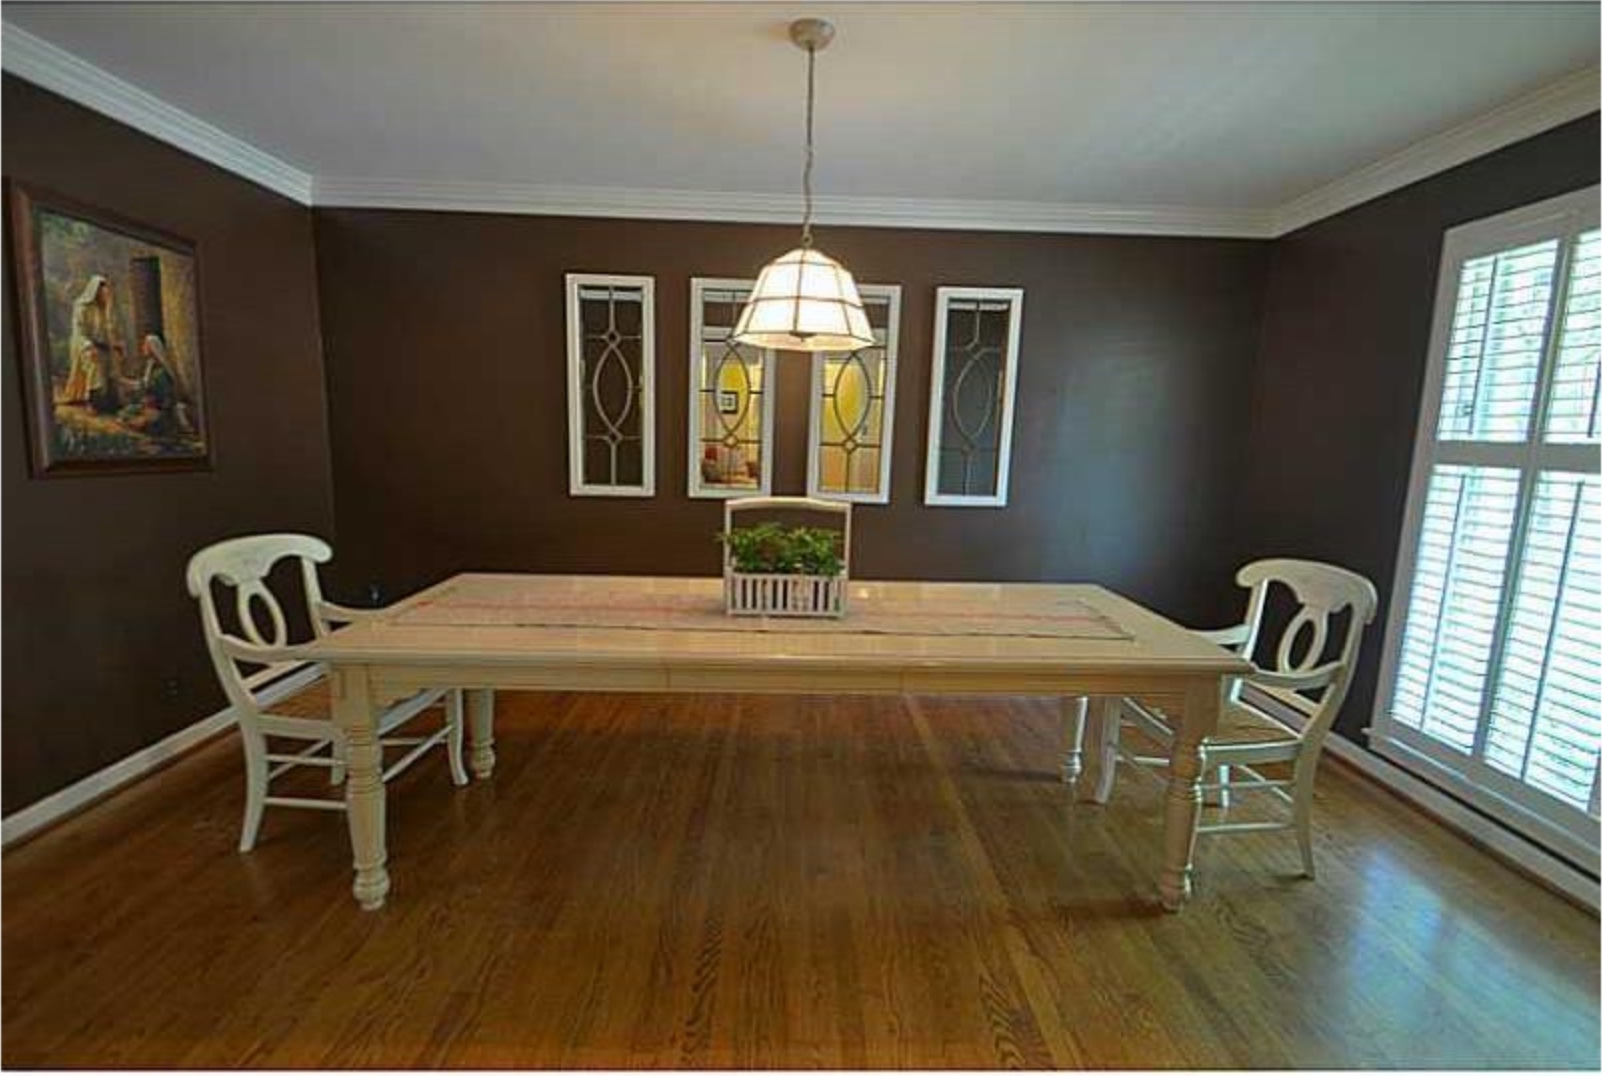
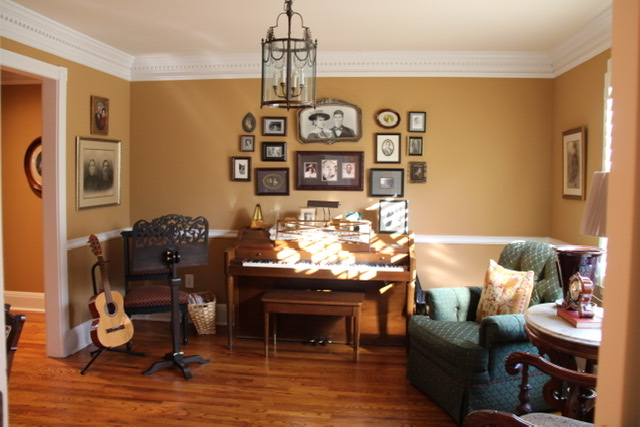
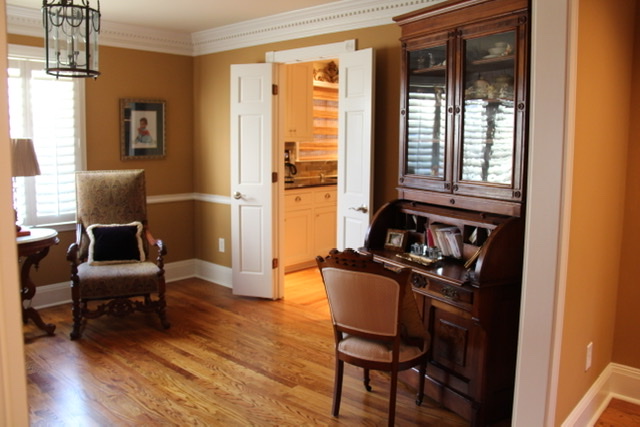
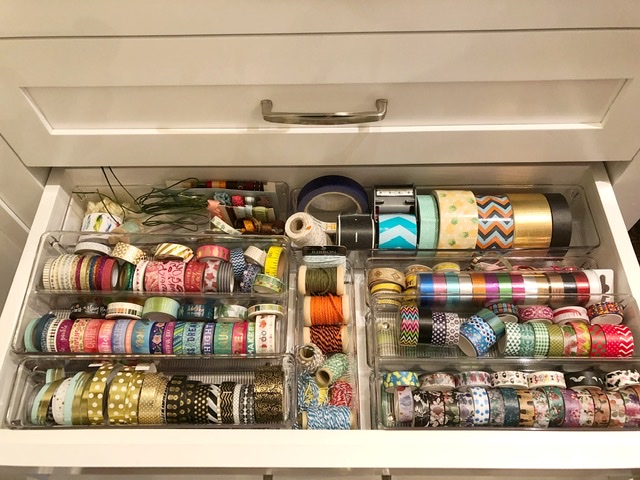
When the Adkins purchased this house there was a formal dining room that they were able to turn into Kelly’s dream of having a craft room.  Having been honored to do a craft evening with Kelly, this room is certainly an absolute dream!  She worked with a designer, a cabinet designer and a contractor in order to make her own mini Hobby Lobby in her house! Here is what it looked like before:

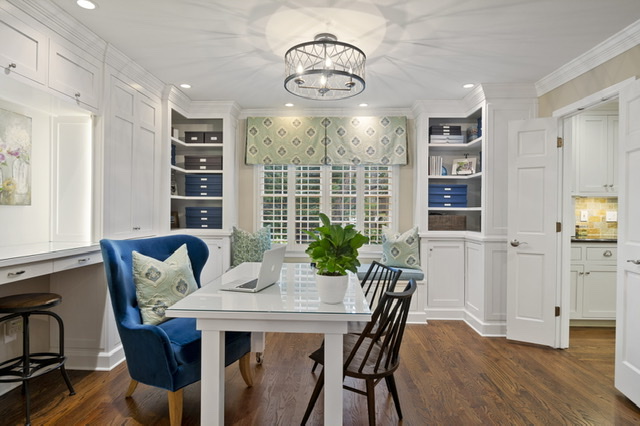
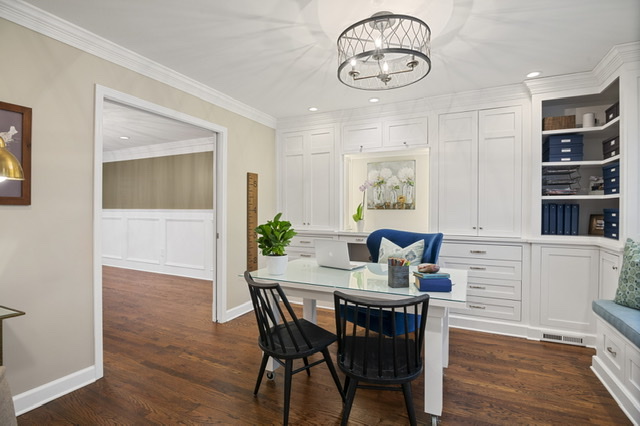
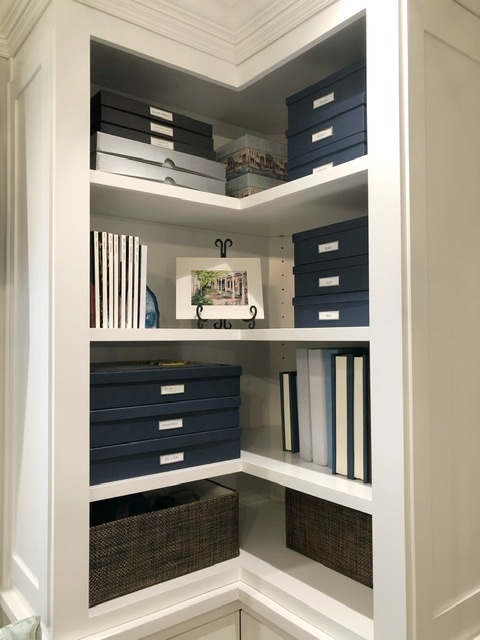
And here is the most relaxing, most organized craft room that I have ever had the privilege of stepping foot in:

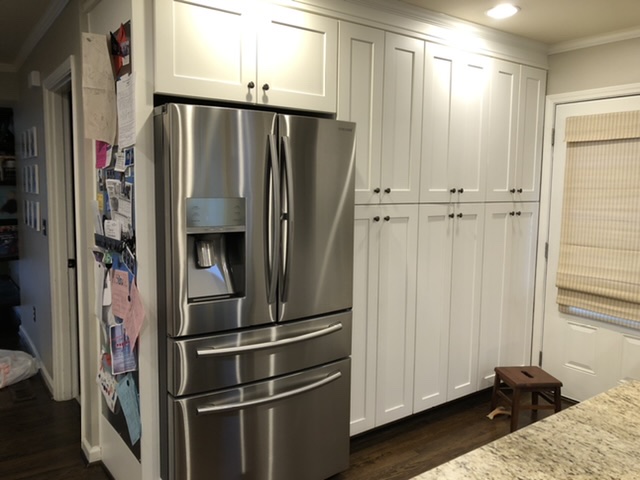
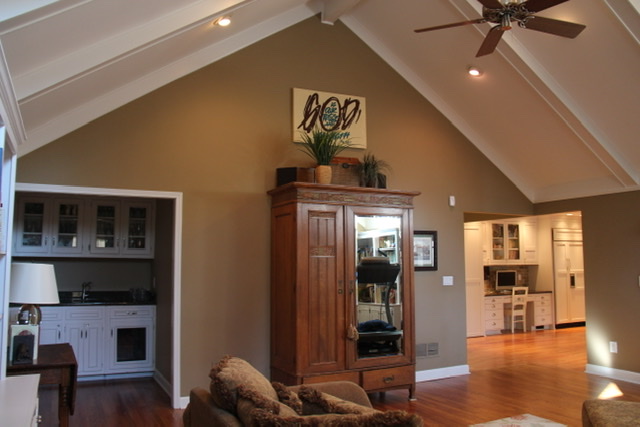
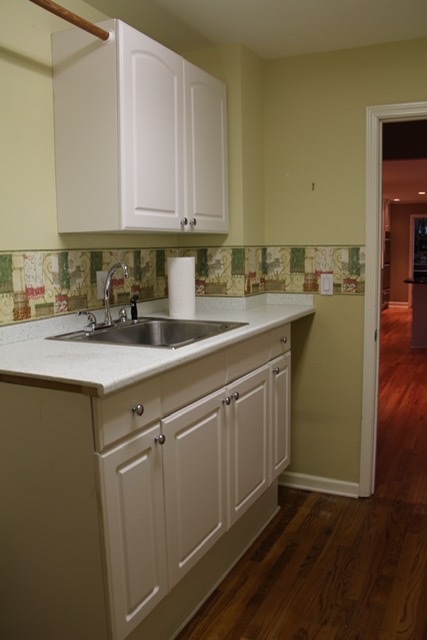
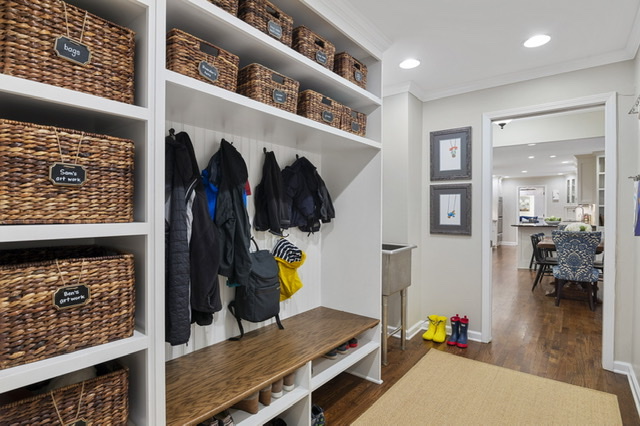
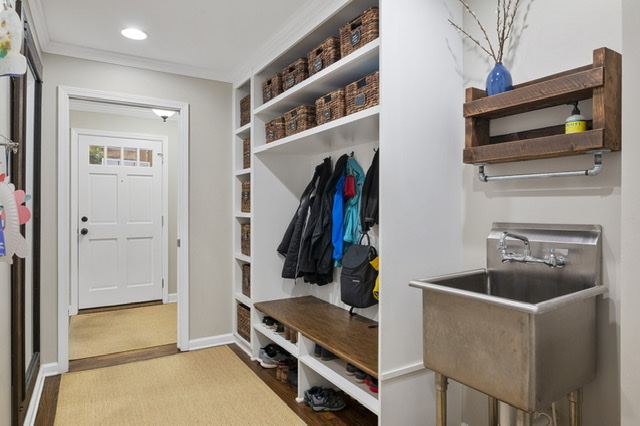
Next up is the mud room.  If you look back at the original photo of the family room you will see that there was a wet bar.  Brandon and Kelly removed the wet bar and opened up that area into a corridor/mud room with an external door to the driveway.  They removed the old laundry room (seen in the before picture below) to upstairs in order to create a large walkthrough mud room.  With three little boys in their family the mud room and sink were a great addition:

And here is the final product, perfectly organized in the most tasteful of ways:

I wish y’all could see this house in person as it truly is beautiful.  Brandon and Kelly, thank you for allowing us inside your home!  

How to Make the Most of Outdoor Space During Quaratine

How to Make the Most of Outdoor Space During Quaratine

If you are anything like us, quarantine has been filled with highs, lows and many, many projects.  We have never been more thankful for our yard and seem to have spent more time out there than we ever have which is what inspired me to do a post about the outdoors.  Nothing fancy, just people who are in the same boat both here in the US and in other parts of the world taking advantage of being outside.  What was awesome about writing this was that I had people from different times in my life get back in touch with things they have been doing, from here in Atlanta, to Chile and to England.  It has been fun reconnecting with old friends through a pandemic.  I’m counting it as one of the blessings of this time shut away.  So, this post is different from the usual, but hopefully one that will inspire you to get outdoors and have fun in the space that you have.

We pretty much always have a project going on around here – last year it was a tree house and swings that Steven decided to design and build, and they truly have been a life saver during our lockdown.  He designed it and then found people who were getting rid of their playsets and got the swings, slides, rock wall and tire swing for a very small amount.  It worked out so well and now even our two year old can make it up to the top and loves it! Our kids have spent hours upon hours out there playing!  The random bit of what looks like graffiti above the green slide is spray chalk which apparently doesn’t wash off quite as easily as one might think!  The swings were set up by attaching a beam between two trees and each of the children has their own swing to play on.  Take a look!

Here is how it looks side by side:

This spring our big projects were these raised garden beds and compost containers.  It is the first season that the chipmunks haven’t eaten our strawberries thanks to the crazy protection Steven put around them.  We are learning though that 3 strawberry plants are nowhere near enough for our family, but the kids enjoy picking one or two each day!

The raised garden beds are surrounded with chicken wire and netting to protect all the vegetables from being eaten by the deer.  As anyone around us knows, we get a lot of deer around here – one time we saw 13 in our yard at one time!  The netting has been placed in individual panels which can be removed for easy gardening access.

When we made the beds we used all our own compost which had previously been an ugly heap at the side of the house.  So project number two was to create containers for the compost.  One for the finished process, on the left, and one for the compost currently being made, on the right.

So that’s what’s new chez Simms, but take a look at all these fun photos of other favorite outdoor spots from our readers.  Hopefully this will inspire you to enjoy your own space even more!  Bonfires have been a big hit around our house and other friends have sent me pictures of theirs too.  I love that no fire pit is the same as another.  Whether they are bought, or made by hand, they are always fun with some yummy s’mores and the joy on the sweet kiddos in the first picture shows what fun they can be.  The second one was made out of a beverage tub and a grate from a grill – genius!

Here are some other beautiful gardening jobs readers have sent in.  The tee-pee gardens are fun for children to play in once the plants grow up, kind of like an outdoor fort! It’s so nice to have the time to spend working in the yard and involving kids is so much fun too!  I love the photo from a dear friend in Chile below, of her daughter helping them water the plants!

How relaxing does this next photo look?  This may need to be added to my list of fun things for our yard.  It looks so peaceful!

And if you can’t leave your house then where better to camp than in your back yard!  

My personal favorite was my brother and sister-in-law in England who put a slack line in their yard and have mastered walking the tightrope can even hold a glass of champagne while doing it!  Things to aspire to!

A friend in England sent me this photo of the cutest little Wendy House (English for play house) and her three children going on a Bear Hunt!  Cute!

The above photos show little boy fun at its max!  The first is of some dear friends here in Atlanta and the second is of our crazy boys on the trampoline with dish soap and the sprinkler… I blame their dad for that health hazard!

Another one that I loved was this bluebird box.  A friend was sharing that they put one up each year and the blue bird lays an egg a day, each day for 4-5 days; then they hatch, one a day each day 12-14 days later.  How amazing to be able to watch this in your yard!

If in doubt though, let’s be honest, a good cardboard box can be more fun than anything we put out for our children.  A friend from England sent me the first picture, the same day as my kids were playing in one (second picture)!

We received loads of fun activities that people are doing with their children too but unfortunately there just isn’t room but thank you all for sending your fun ideas, we loved them!  So, while this was far from my normal post it is probably one of my favorite ones thus far.  Folks, we are all in this together, near and far, all over the world and whether here, or in another country, we are trying to keep our children busy, keep our spirits high and get through this lock-down.  I hope this has served to brighten your day even if you never intend to play in a box!  Here are some cute chickens from another reader here in Atlanta to end our post!

Fireplace Facelift in Mill Glen

Fireplace Facelift in Mill Glen

As we head into week seven of our new normal a few people have asked for some DIY projects to be posted on the blog as many of us are entering into times of financial stress.  So today I thought I would do a short and sweet post on our fireplace which we did ourselves.  There is always a sense of achievement when we do something ourselves and I hope that this post inspires you to take the plunge and do a project in your home over the next few weeks while we are stuck at home.  Look out for our next post about outdoor projects while we enjoy this beautiful weather.

A coat of fresh paint can revitalize a room or an object.  As all my friends know, I almost always have a painting project on the go, whether it is refinishing a piece of furniture, painting bookshelves, window frames, or rooms, there is always something that can benefit from a new coat of paint.  When we moved into our house, we lived for years with our gray brick fireplace, and cabinets on either side that were somehow missing doors… literally one side had them and one side didn’t.  Where they went, we will never know!  So, as children’s lego covered the floor one night I decided I needed to replace the doors and hide the lego – there is always an ulterior motive when mom starts a project!  I then decided we needed to new mantel too and why not paint the brick white too to brighten the room?  What started as a simple project became bigger by the day, but the finished project has totally changed our living room and has become my favorite update in our home.  Here is what it looked like before (no judgment please!):

We don’t have any photos of it in progress so here is the finished product:

Steven was not completely convinced about painting the brick at first, and to be honest he had a point. The thing about painting brick is that there is not an easy way to undo it when it’s done. I’ll never forget putting the first bit of paint on and him saying, “there’s no going back now!” Way to instill confidence! I did slightly panic at that point, but he was right, I couldn’t turn back! We used Benjamin Moore Simply White for the paint color and bought replacement doors online.

Casey Libby had told me about a lumber yard up in Kennesaw that had great weathered wood and could potentially have mantels too, so one afternoon we took the kids on a little road trip to see…wood!  Funnily enough they actually had a good time climbing on it all, but I’m pretty sure the people working were pleased when we left! We took a look at the beautiful thick mantels they were selling, then saw the price and decided there had to be a cheaper way, so we looked around and Steven found the most beautiful piece of reclaimed wood. The funny part is that the random piece of wood that we found for the mantel is the thing that people seem to comment on most in our living room.  It was $80 verses almost $1000 for a specialty one, and we love its simplicity in the room.  Both Steven and I adore reading so, call us old fashioned, but we like to put books on our bookcases!  Steven had collected the majority of these old books from antique stores over the years and his grandmother gave him the collection on the upper shelves.  I knew that I could find a frame to match for my mom’s beautiful English countryside painting and voila fireplace makeover was complete. Oh and bonus, we all like it and love the white brick!

Roof Replacement in Mill Glen

Roof Replacement in Mill Glen

I don’t think there has ever been a time in my life when I have been so thankful to have a roof over my head.  The big storms that hit on Easter Sunday were a reminder of how fortunate we are to have a nice home and how quickly that can be taken away.  That, coupled with the 5 weeks of quarantine that we have been in, have made me ever more grateful for my little family and the house that we have been blessed with. As crazy as it is with littles running around all day long, it is a blessing to be able to provide them a home and with that, of course, comes a good roof.

We were trying to think of things that people might be able to get done, or need to get done, without having people inside their homes and what better than replacing a roof?

So, today’s blog post is not a big glamorous before and after, but what I call a rather “boring” before and after.  Steven then corrected me that it might not be glamorous, but it is one of the most important updates that houses need over time.  Our house needed a new roof about 2 years ago.  Actually, it probably needed one about 4 years ago, but we put it off.  There were little brown patches on the bonus room (over the garage) ceiling from roof water leaks that kept appearing ever so slightly bigger.  Was it really getting bigger, or were we just worrying?  It wasn’t super obvious, so we tried to ignore them, and then one night Steven decided to put a tiny pen mark on the edge of them to see if they were growing.  Sure enough, after the next big storm it had grown rather a lot.  Word to the wise: when you start seeing brown patches on your ceiling you most certainly need a new roof!   The extra damage being caused by water getting in could cost you way more in the long run.

So alas, we had to get a roof.  It’s one of those updates that no one notices, but you really want to have a good job done.  One of my husband’s many skills is doing plenty of research on who to get to do the job.  After getting quotes from no less than 7 roofing companies, he chose Nick Mees from Element Pros and we could not have been happier.  Nick came in with one of the lower prices than many of the other companies we had come out, and seemed like someone we could trust to do a good job.  We also chose Nick because his business is located in Dunwoody. Take a look at the wonderful work his team did on our not so boring roof.  Here is one of the holes that was responsible for those dreaded brown marks:

And here are the before and afters placed side by side for you to see the changes.  In the first set you can see Nick added a chimney cricket (Steven had to tell me what this is!) to shed the water away from our chimney when it rains:

And this is what it looks like now, without a hole and with new pipe flashing:

In the current economic climate we like to try to support our local businesses as much as possible and Element Pros roofing is headquartered in Dunwoody.  They have been in business since 2006 and make it their goal to provide a stress-free and surprisingly affordable roof replacement process for our customers. Nick is very friendly and shared that his job is to learn, listen and consistently deliver on an improved construction experience.  He understands that it is better to do the job right the first time, and build roofs that are built to endure the elements.  If you are in need of a new roof then we encourage you to reach out to Nick.  Click here for his contact information.

Ranch Renovation in Dunwoody

Ranch Renovation in Dunwoody

It’s week three of quarantine and we are all hanging in there.  My house looks like a tornado ripped through, my kids are still eating more than I ever thought was possible, and if I step on one more lego….  Anyway, I digress!  Funnily enough, writing this blog is a wonderful distraction and I hope it serves to do the same for you as you read.

Before all this started, I enjoyed taking photos of some great houses.  One of the things that motivated me to get this thing off the ground was trying to figure out how people make the most out of the space they have.  The house we are featuring today has maximized its space beyond belief.   The Jeon family did a kitchen renovation a few years ago and the house in the before photos is almost unrecognizable now.  With 4 children, they need all the space that they can get, and they definitely achieved that with the work that they have had done.  They extended the kitchen into the garage and then built another garage on the side of the house.  I didn’t take a photo of the exterior of the house but, for reference, they live in a ranch style house and it is shocking how much bigger the interior of the house is with this renovation.  Below are 3 photos of the kitchen as it was originally, and a photo of the dining room which was knocked through to the old garage to become the new kitchen:

And this is what it looks like now, with enough space for a bar stool (chair) for each child!

Wanda designed the whole thing with her contractor knowing that they wanted plenty of counter space, good flow to the room, and a farm sink.  She also added an extra dishwasher which, in my humble opinion, is genius!  This is especially true right now, when we are stuck in our homes all day… the number of dirty dishes!  Crazy!  Here are some more photos of the amazing space they created:

The Jeon’s renovation made such a difference to the communal space in their home, and it looks phenomenal!  As with so many of our other featured renovations, Wanda said that she was glad to be involved in every step of the process as there is no detail that is insignificant.  Even little things like where a light switch should go, where on the wall you want the thermostat to be positioned, or which way you want a door to open, are all things that may seem insignificant at the time but will bug you for years to come if they are installed in the wrong way.

Jeon’s, thank you SO much for letting me into your house pre-lock down, I’m so thankful we managed to fit it in.